An Alternative Waterloo Campaign Part One: The Battle Of Fontaine
A few years ago, our group made the decision to launch a Waterloo campaign. One of the reasons was that it made sense of wargaming. Fighting divisional battles with balanced forces was a highly sociable event but lacked spark and lacked purpose. A campaign puts us in the shoes of commander who has to has limited information, has concerns over line of communication and logistics and the myriad of situations he has to be aware of. It was really interesting to observe how players reacted to events as they occurred.
NAPOLEONIC
Dermot Quigley
1/15/202410 min read


Fontaine l’Éveque lies to the west of Charleroi, where an Allied force commanded by Lt. General Sir Thomas Picton chased down a retreating French force under GdD Count Reille that had been isolated on the north side of the Sambre without support.
It was crucial that Reille break through the town of Monceau sur Sambre to escape encirclement. This was his main objective. On the Allied side, Picton was determined to stop them at all costs.
The campaign was played by a varying number of people around the world. They would use their favourite battle rules, and I, as umpire, would compute the results for the master OBs at the end. It was that simple. This particular battle was fought by our friends in Spain under the auspices of Dermot Quigley of Campaign Game Miniatures, using their own rules and figures , ‘Imperial Eagles’.
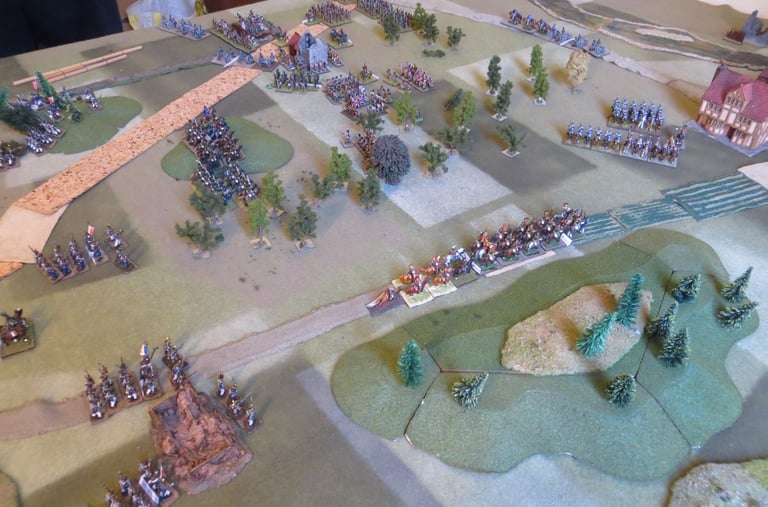
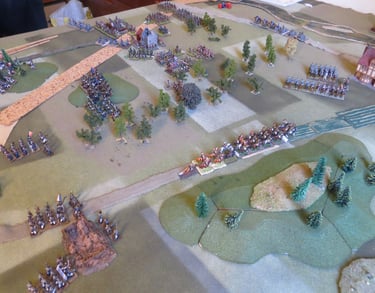
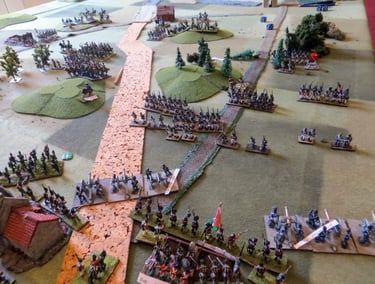
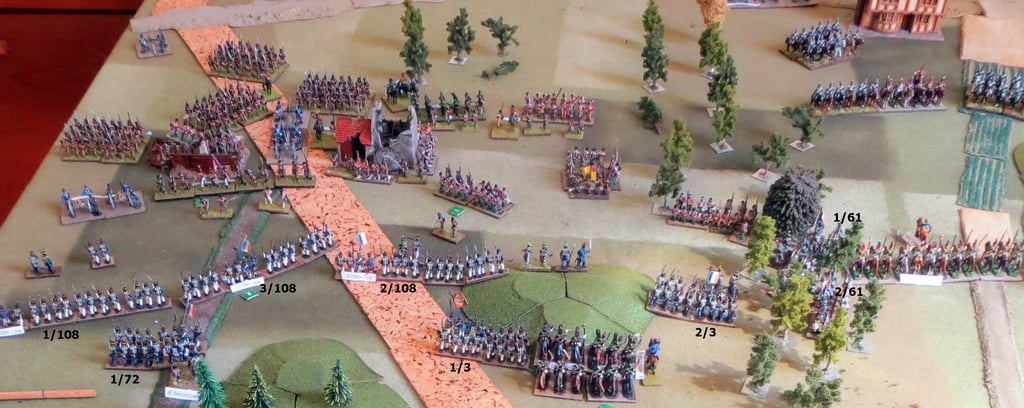
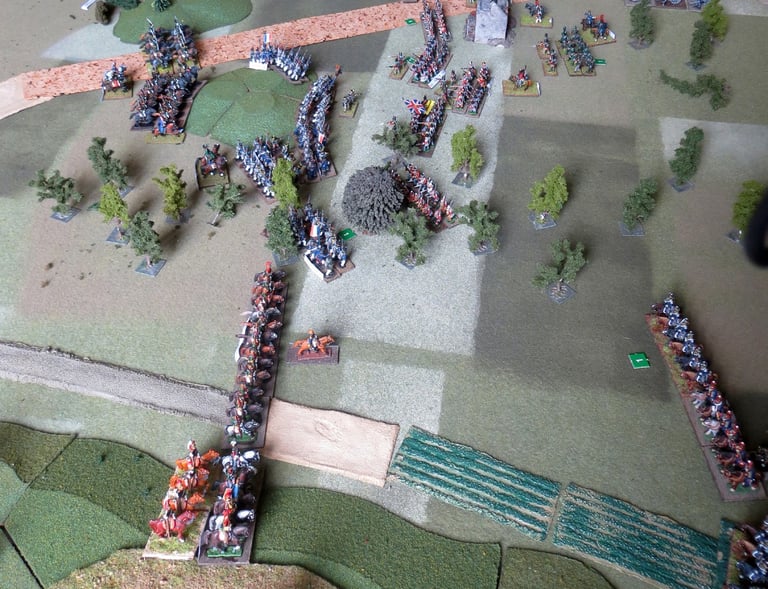
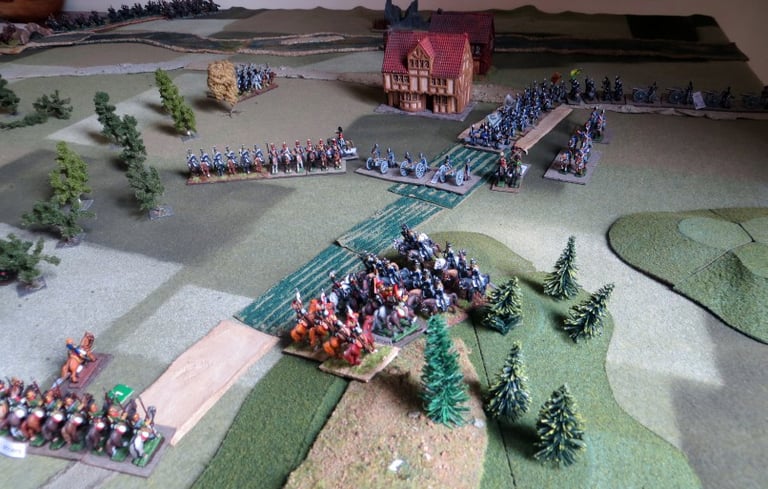
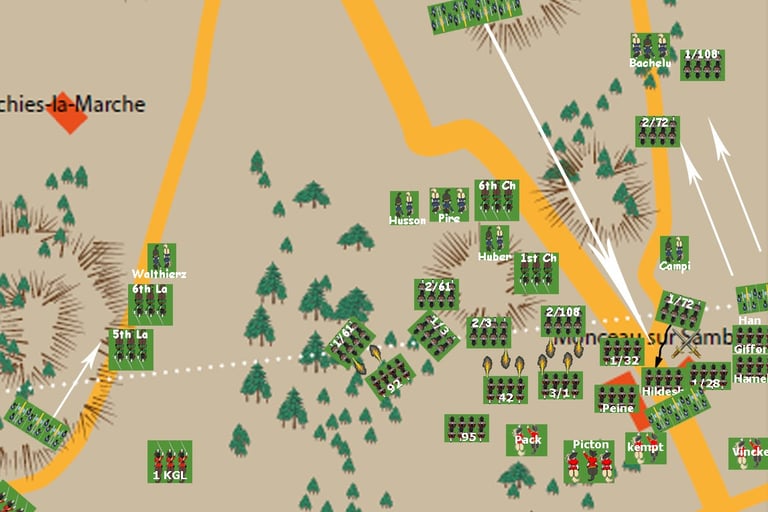
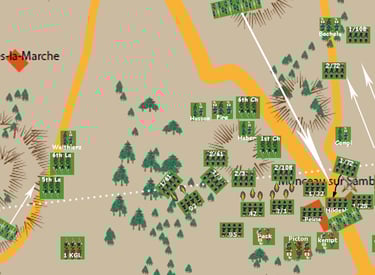
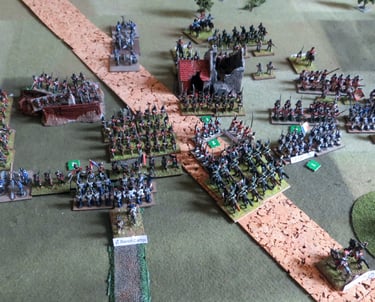
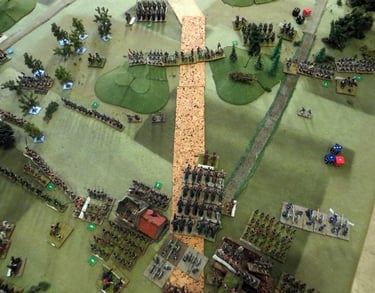
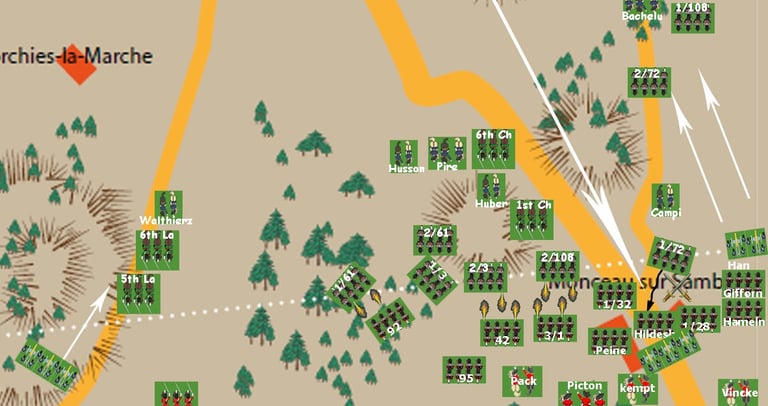
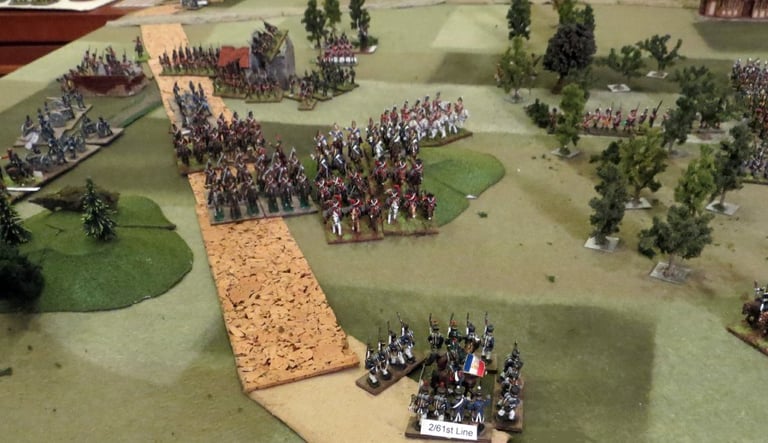
The initial deployment of the armies is shown above. The battle started at 5.30 p.m. near the town of Fontaine L’Evequee but was centred around the town of Monceau sur Sambre.
Due to the hilly and wooded terrain, not all the guns had a clear line of sight, so they could not always participate. The battle started with a bombardment nonetheless.
The initial deployment of the armies is shown in the map above. The battle started at 5.30 p.m. near the town of Fontaine L’Evequee but was centred around the town of Monceau sur Sambre. Feel free to download the OB via the button.


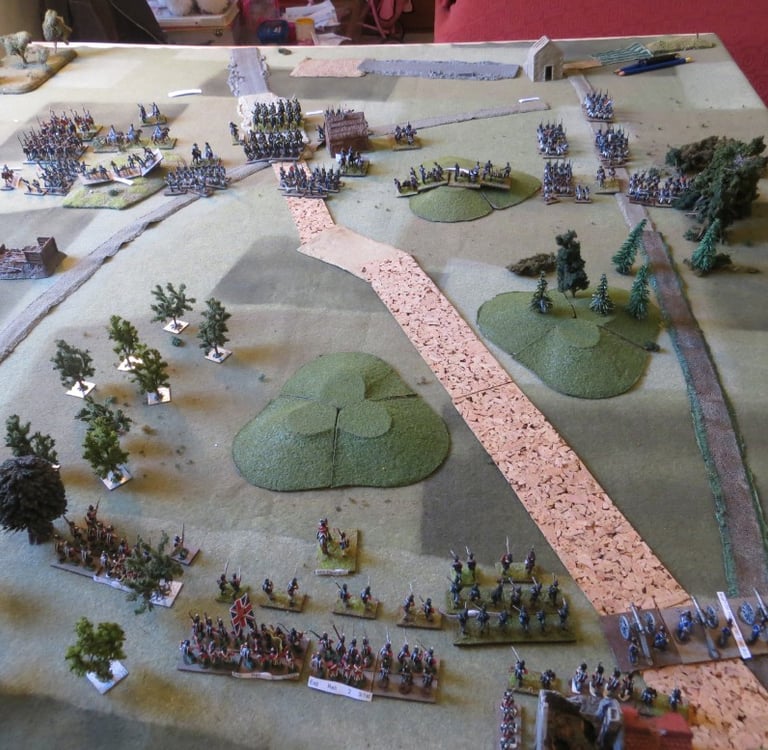
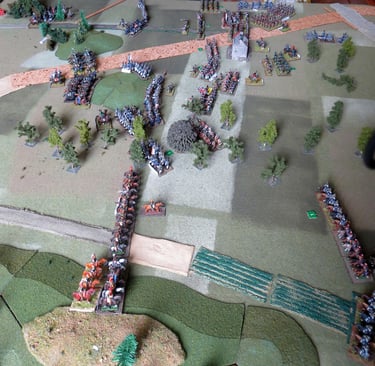
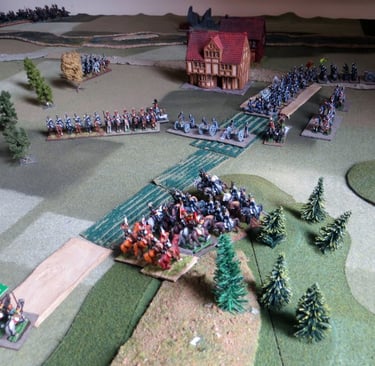
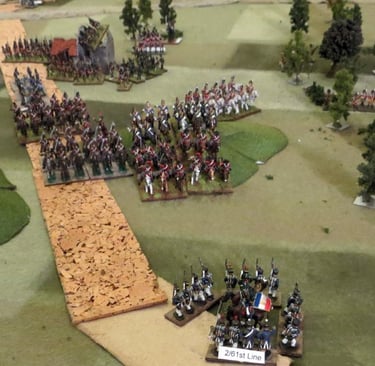
The deployments were seen towards the Allied side and then from the Allied side.

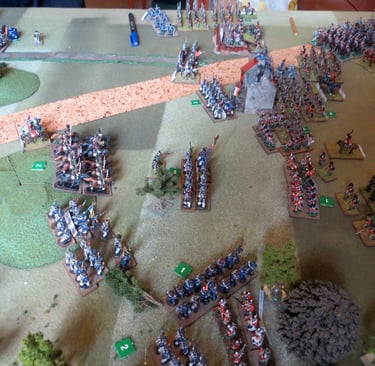
The French under cover of their artillery advanced their Lancers on their right and the Chasseurs a Cheval in the centre as the infantry followed on behind.
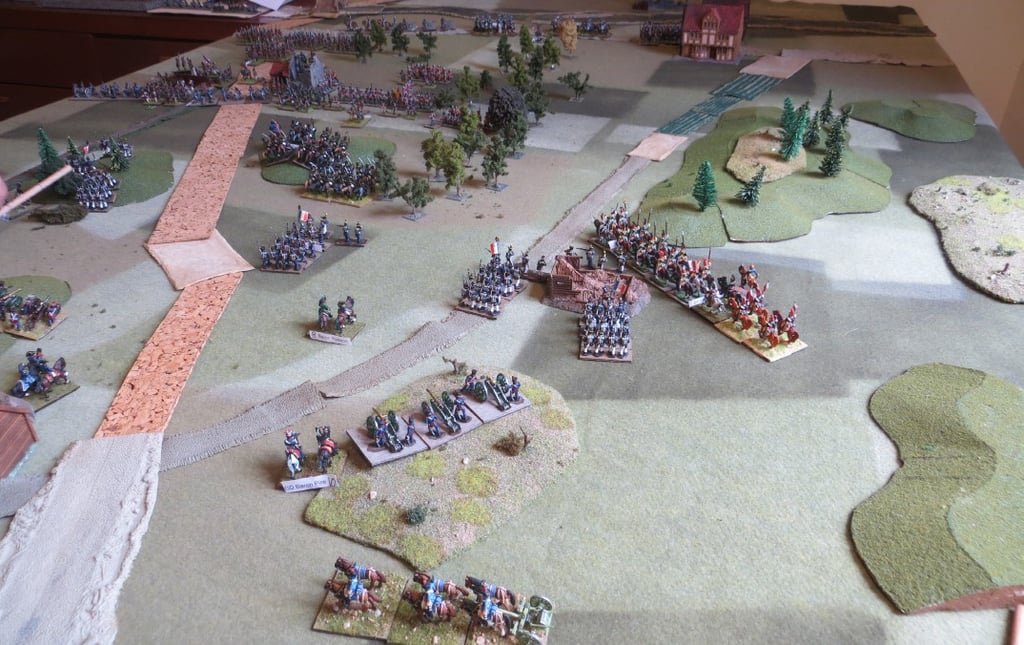
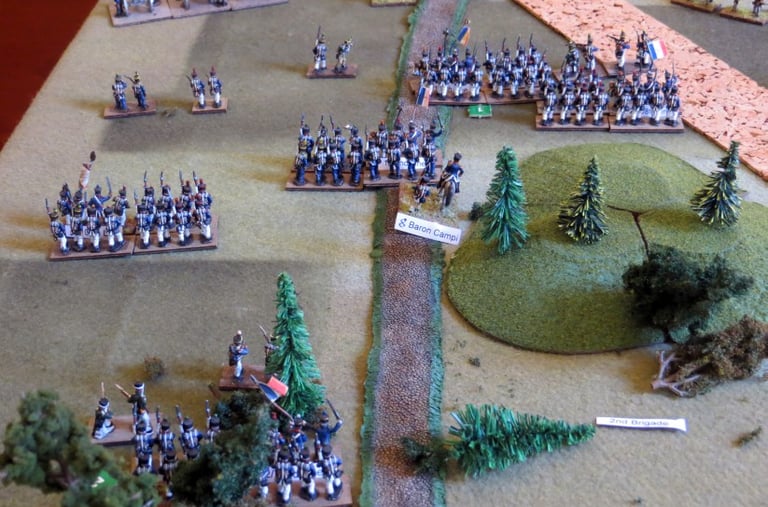
Baron Campi’s infantry Brigade use the forests and hilly ground as cover on their fast approach.
The accuracy of the French artillery has already disabled one British gun and caused some confusion among the ranks of the infantry deployed in front of the town.
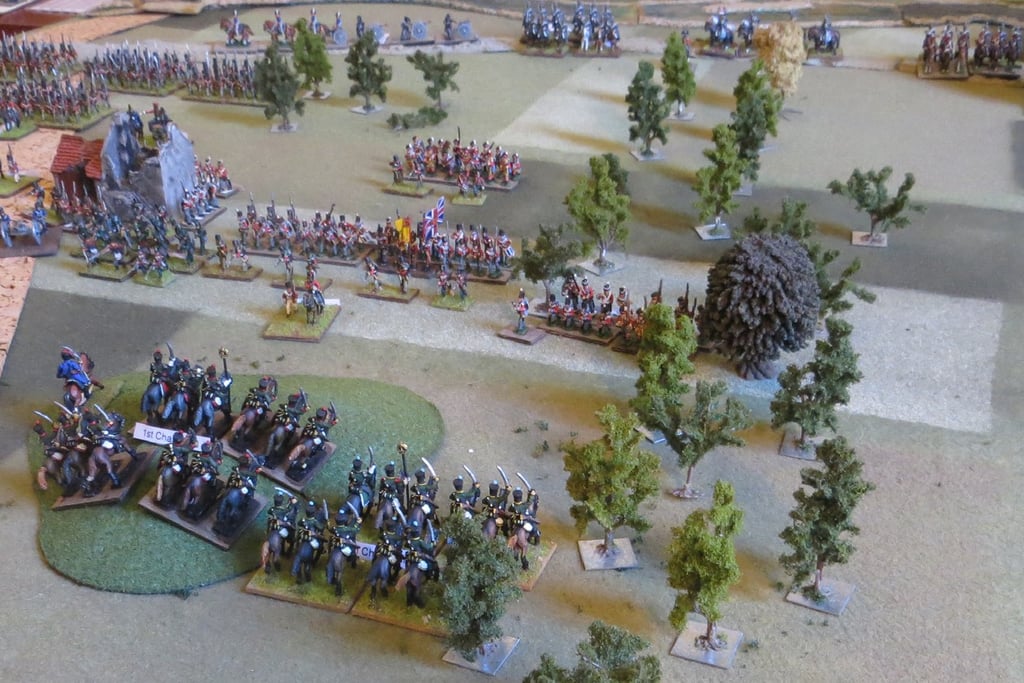

While the Lancers outflank using the road on the right the 1st Chasseurs a Cheval prepare to charge from the hill, but as the Chasseurs pass the crest of the hill the British battalions in the centre react by forming squares while the longer range of the 95th Rifles pour in a withering fire supported by the artillery battery to their right. This sadly for the French, forces the Chasseurs back behind the crest of the hill.
The British Rifles, having now highlighted themselves, come under bombardment along with the British battery to their left (out of picture).


As the Chasseurs pull back behind the hill to regroup, Campi launches his attack, backed up by the artillery, which has dismounted a British gun (the gun on the right turned away) and taken more toll on the exposed 95th Rifles. The French skirmishers and the 3/108th battalion then move forward and fire on the battery.
The first crisis for the British is about to occur. The rifles receive another shower of roundshot, and the British Divisional artillery find themselves too exposed to the French infantry fire, so offer one more salvo and then fall back.
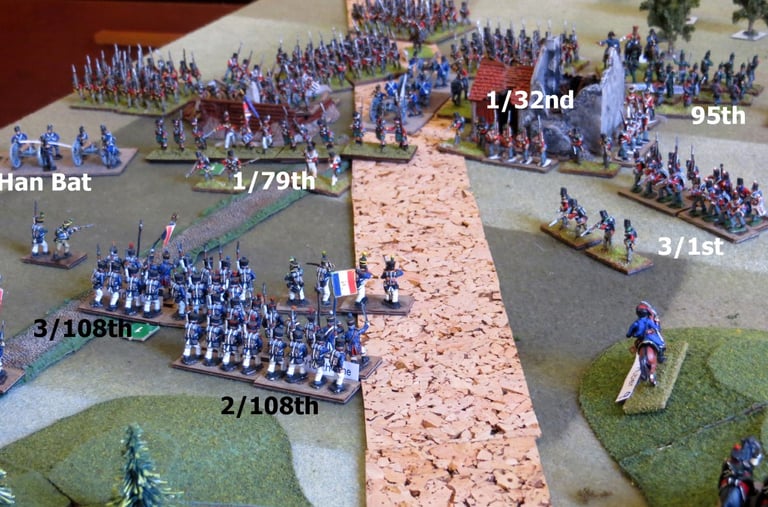
The rifles rout past the town and are stopped by General Picton himself. Meanwhile, Sir Dennis Pack orders the 3/1st Battalion out of square and forward against the French. The 1/79th Cameron Highlanders deploy across the road, covering the retreat of the British battery, which pulls back through the town and exchanges fire with the French 3/108th. Casualties are mounting on both sides.
Picton has ordered Vincke’s 5th Hanoverians in the second line to move forward towards the town. His reaction to the swift French advance has been timely.
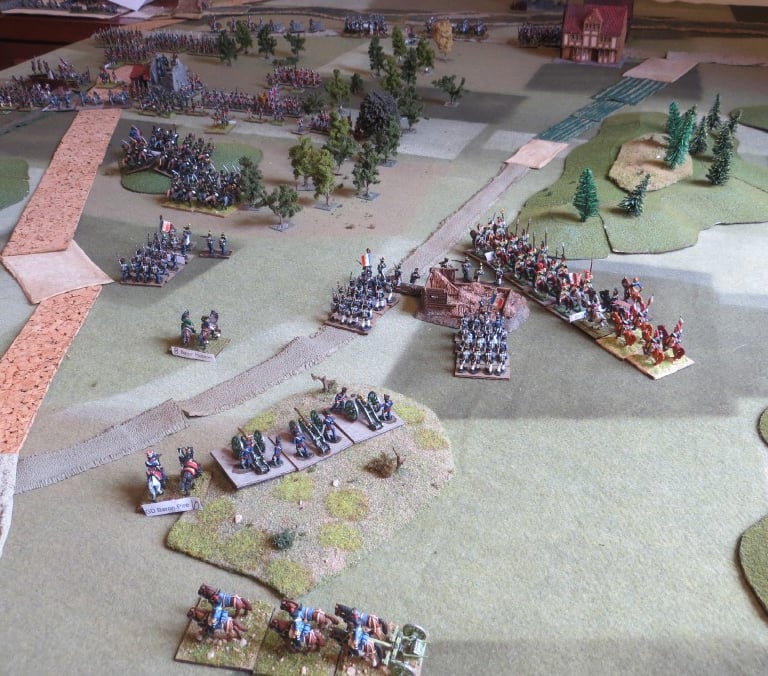
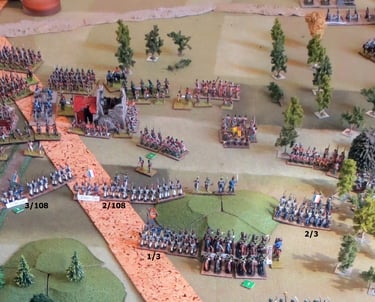
Another view shows the French attacking with four battalions while keeping one back in reserve on the edge of the forest and a fallen tree due to canon fire.

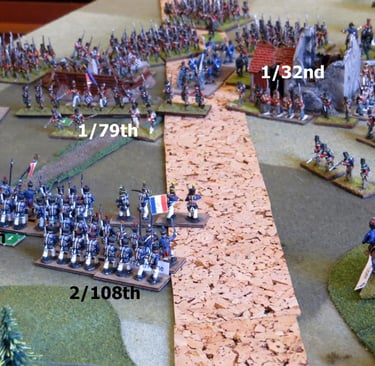
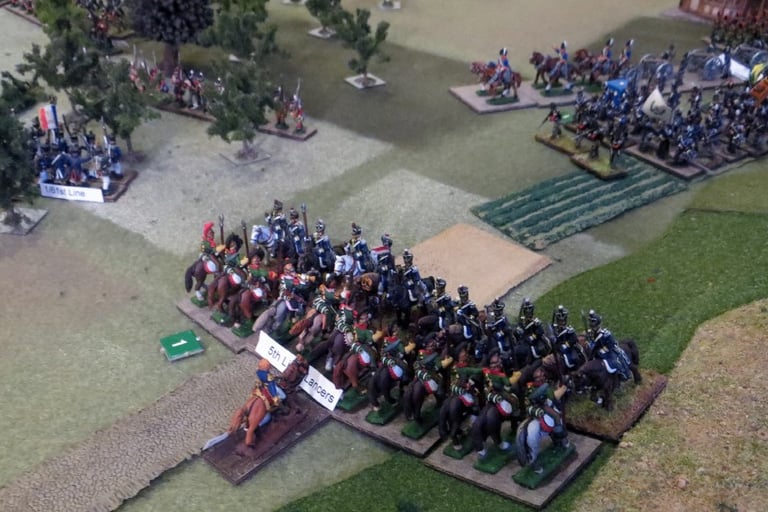
The three battalions of the 108th regiment deployed into line and put out of action one of the Hanoverian guns while causing casualties on the British battalions. On their right, Husson’s Brigade has at last started to catch up, and the 1/61st battalion has entered the forest on the left of the British flank, where stand the isolated Gordon Highlanders (1/92nd).
The British cavalry are facing off against the French lancers, but neither cavalry seems ready to attack.
The only respite is that the French battery supporting the infantry from the hill has now fallen silent.
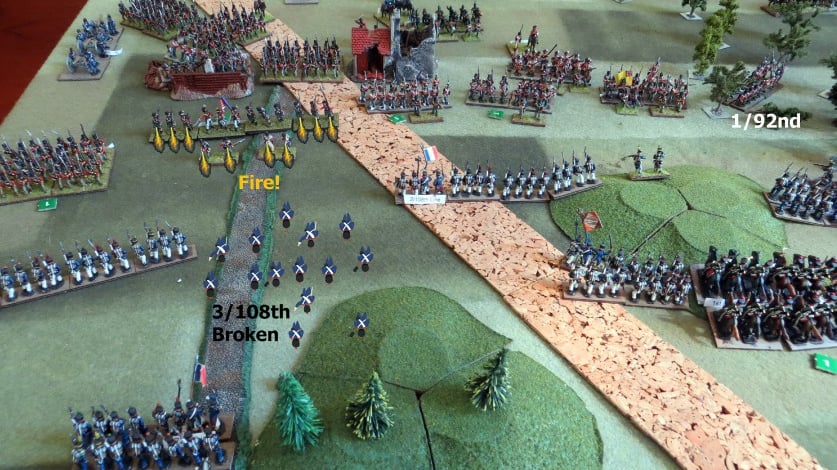
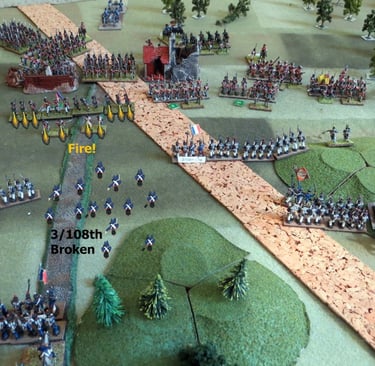
The Remaining Hanoverian guns fire canister at the 3/108th then the musketry of the 79th Cameron Highlanders send them running in disarray.
Picton meanwhile has rallied the 95th Rifles. On the British left the battalion commander of the Gordon’s has refused his flank in preparation for the attack of the 1/61st. The Hanoverian battery falls back in face of the 1/108th and the Hameln battalion takes their place advancing boldy to keep the French from this flank. But they immediately take casualties from musket fire and fail to make an impact. However, they are holding the line.
The British have once again stabalised the situation
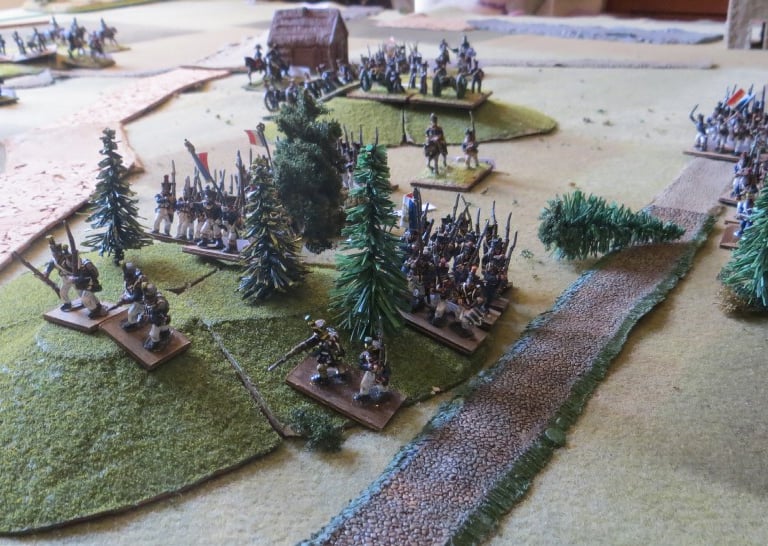
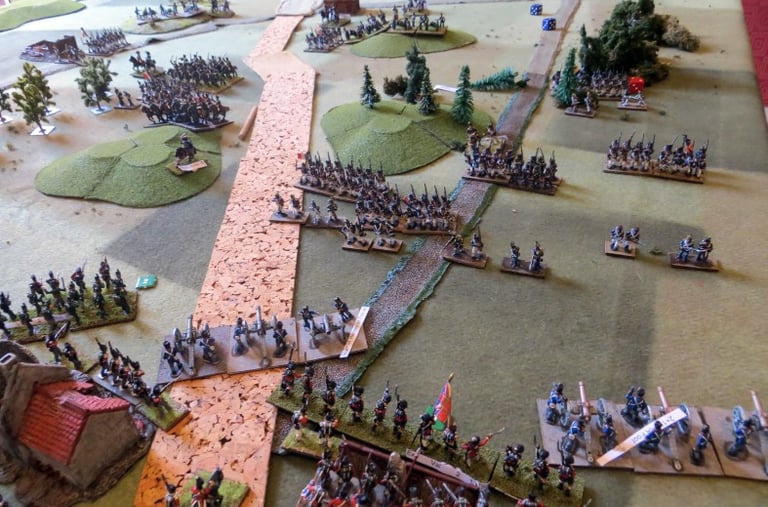
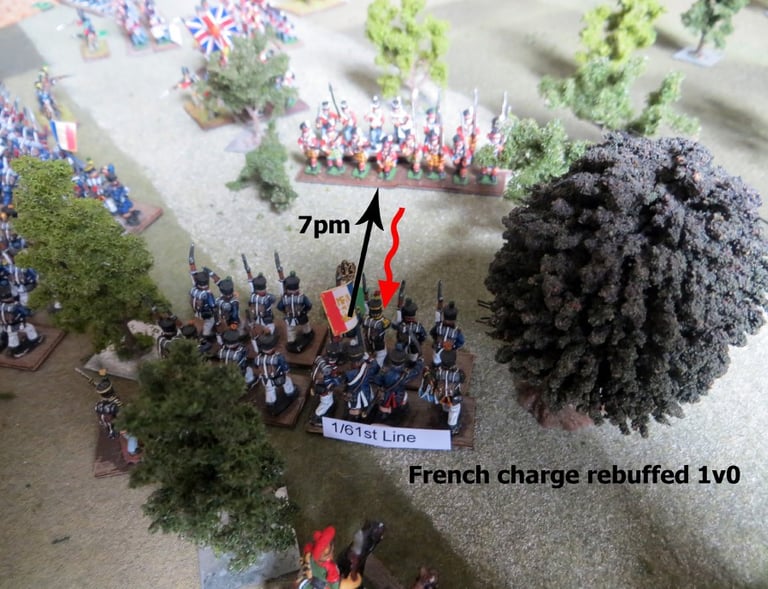
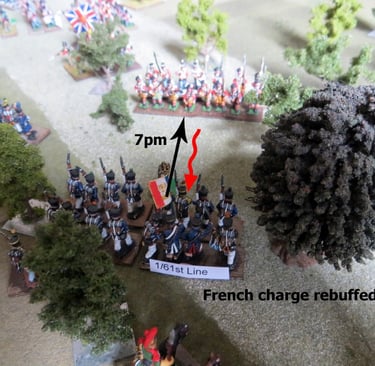
It is 7 p.m., and a crisis is developing on the flank. The 1/61st Line charges the Gordons in the initiative phase, but they are rebuffed and forced back. The importance of this melee can be seen as the supporting French battalions move forward in the subsequent move phase to position themselves ready for a charge. They discharge their muskets, and a desperate firefight resumes all along the line, as shown below.
The British cavalry is suffering fire from a distant horse battery on a hill further up the road, which is firing over the heads of the French cavalry. The Chasseurs have readied themselves on the road in the centre.
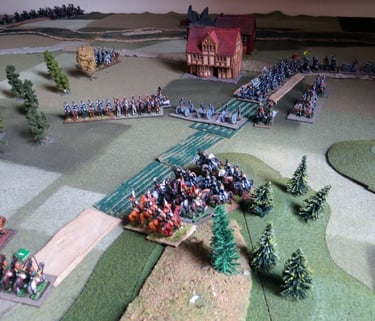
7.45pm British reinforcements arrive! In the distance on the roads leading to the field behind the British positions, colums are visible.
The 6th Lancers are defeated, having charged 10th Hussars and are forced to retire. The 10th Hussars recall to recover after the victory and stay out of sight of the covering French Horse battery, conscious that time is now on their side as a Dutch Belgian column is marching towards them along the road behind.
8pm. British right flank: The French mount a massive and desperate attack after a stern firefight in which the 1/108 has had to withhold casualties. The British Hanoverian battery has taken the opportunity to return to it’s position.
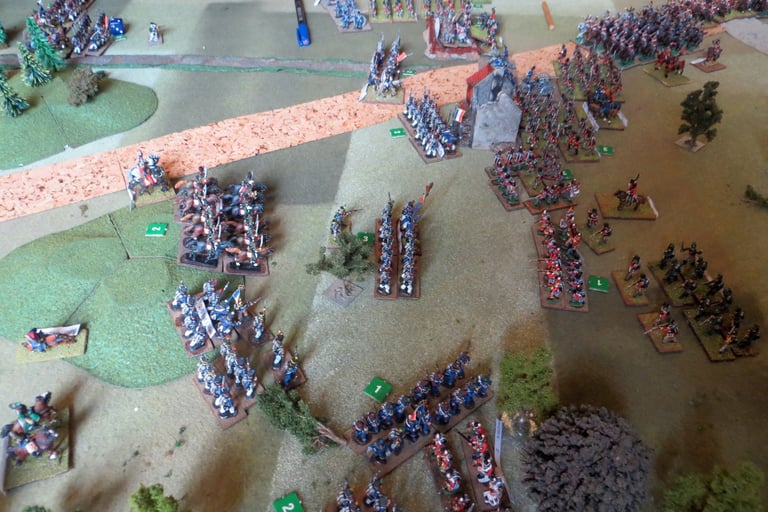
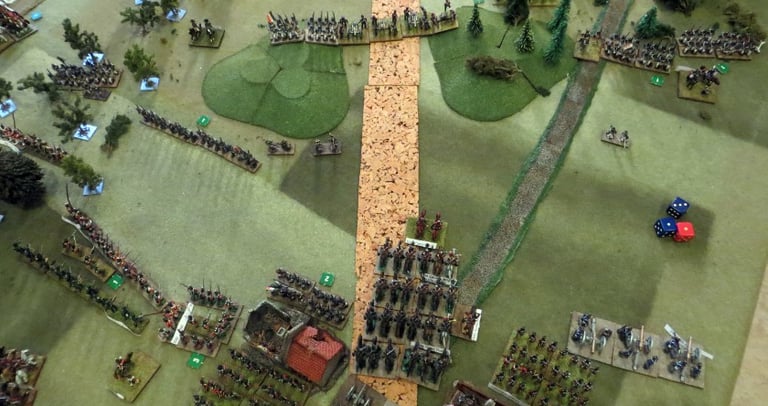
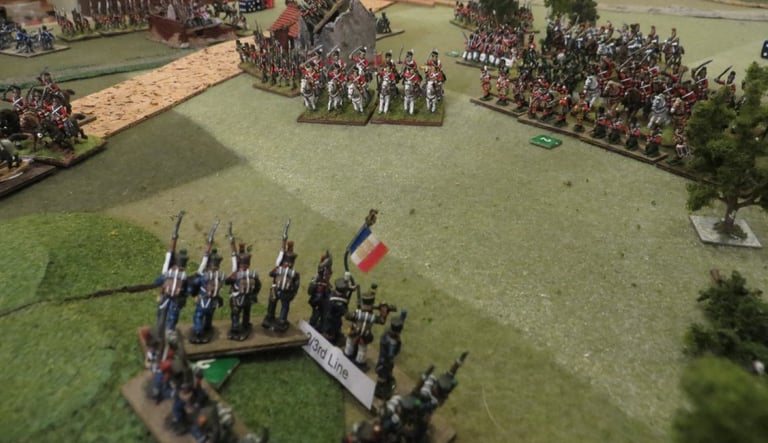
Below, we can see that Campi attached to the 1/72nd has led the melee against the Cameron's, while the 1/32nd has formed a square against the 6th Chasseurs charge. To their right, the 2/108th continue their firing against the 3/1st. And further to the right, the 2 battalions of the 3rd Line have charged the 2/44th battalion.
The Peine battalion has occupied the building in the centre, whilst 28th Foot occupy the other.
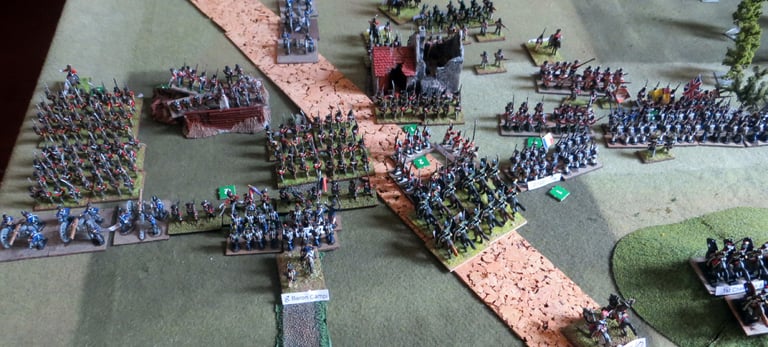
The victorious 1/72nd now charges the Hildesheim battalion in the initial phase, forcing them to retreat. With Campi at their head, they then defeat 1/32, the last battalion between the building and the French. The 92nd again finds itself threatened on the flank. Both sides are suffering attrition from the constant fire and melees. The French are now aware of the arrival of reinforcements and know that time is running out. They must make a breakthrough, or all will be lost. The 6th Lancers successfully overran the British horse battery on the hill on their right flank, taking off the pressure momentarily.
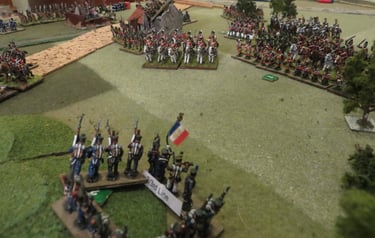
The British, despite losses, continue to hold the line. The 2/108 turns their attention to the now exposed building and, by doing so, opens up a path for a possible charge by the 1st Chasseur, a cheval. The 3/1 pulls back to the side of the building and forms a square in response. The photo below shows the climax of this phase as the 2/108th charges the Hanoverian Peine battalion, holding the building, while the 92nd engages in a desperate hand-to-hand struggle in the forest against the battalions of the 1/61st and the 1/3rd lines.

7.45pm British reinforcements arrive! In the distance on the roads leading to the field behind the British positions, colums are visible.
The 6th Lancers are defeated, having charged 10th Hussars and are forced to retire. The 10th Hussars recall to recover after the victory and stay out of sight of the covering French Horse battery, conscious that time is now on their side as a Dutch Belgian column is marching towards them along the road behind.
8pm. British right flank: The French mount a massive and desperate attack after a stern firefight in which the 1/108 has had to withhold casualties. The British Hanoverian battery has taken the opportunity to return to it’s position.
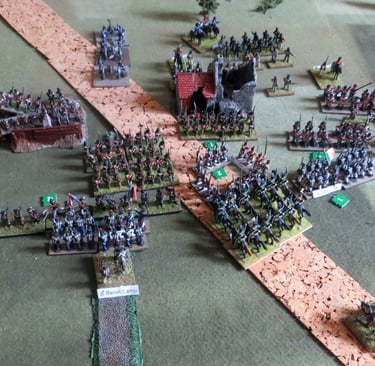
Below, we can see that Campi attached to the 1/72nd has led the melee against the Cameron's, while the 1/32nd has formed a square against the 6th Chasseurs charge. To their right, the 2/108th continue their firing against the 3/1st. And further to the right, the 2 battalions of the 3rd Line have charged the 2/44th battalion.
The Peine battalion has occupied the building in the centre, whilst 28th Foot occupy the other.
The combined attack of the 3rd Line breaks the 44th British East Essex and the 1/71 Line breaks the 79th Cameron Highlanders, but the 1/32nd in square stave off the 6th Chasseurs a cheval.
The heroic stand by the 92nd Gordon Highlanders defeats both French battalions, forcing them to retreat.
The 10th Hussars charge the 6th Lancers after the rout of the 18th Hussars from a ballshot, while the 5th Lancers, recovering from their previous defeat, pull further back to their own lines as the Dutch Belgian column comes forward along the road, making the flank completely secure and threatening to outflank the French.
The 2/108th (in the previous picture), despite a desperate fight, inflicted major casualties on the Peine battalion but failed to take the building.
The 1/72nd, after defeating three enemy battalions are finally dispersed by canister fire, but the heroic General Campi is able to escape back to his lines by horse. The British Heavy cavalry led by the 1st Lifeguards, followed by the Royal Horse Guards charge up the road. The French foot battery has come forward and deployed straddling the road to face them.

The 1st Lifeguards wipe out the French foot artillery battery, and the next target is the 2/61st with Brigade General Husson. The Royal Horse Guards head towards Campi’s two remaining battalions. Meanwhile, on the British left flank, the incorrigible Gordon’s break the 1/61st battalion and advance.
The 2/108th was caught by the 1st Dragoons outside the building. The Scots Grey’s, in the picture above, are about to charge the half-strength 2/3rd Line’s square. Lt. Col. Hamilton shouts, “This is glorious,” and Ponsonby replies, “Only if victorious. Scotland forever! Charge!” The end comes quickly. The only infantry battalion to escape Courcelle Road is the 2/72nd, along with General Campi. The 1/108 die blocking the Courcelle-Monceau road was sabered by the Royal Horse Guards and the 2nd Life Guards. The majority of the French staff manage to escape, but General de Brigade Husson surrenders inside the final square of the 2/61st. The French horse battery is caught on the road by the 1st KGL Hussars, and the battle ends as night falls.
Only the Chassuers, a cheval, and the 5th Lancers, along with the sole infantry battalion, escape.
The last square of the 2/61st, with Brigade General Husson inside, was approached by the 10th Hussars to the right and the 1st Dragoons in front, who together accepted their surrender. The advance of the British on the left can be seen in pursuit of the French as night falls, and the Dutch and Belgian troops on the right.